爆速で開発するための Vuetify チートシート

はじめに
この記事では@vue/cliとVuetifyを使って初めてWeb開発する人向けに、よく使う構文やコンポーネントをまとめました。基本的にコピペで使えるように、単一ファイルコンポーネントを使用しています。
動作環境
- Vue.js: 2.6
- @vue/cli: v.4.4.6
- node: v8.10.0
- npm: v5.6.0
導入
Vue.cilのインストールとプロジェクトの作成
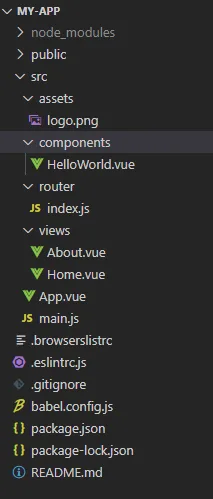
以下の記事を参考にして@Vue.cil をインストールし、プロジェクトを作成してください (ここでは "my-app"という名前で作成しました)。
https://qiita.com/C\_HERO/items/318fe65871f8e53e8c80
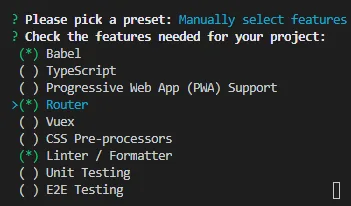
なお、プロジェクトを作成する際は「Manually select features」を選択し、「Router」にチェックを付けておいてください。それ以外の質問は全てYesかEnterでいいです。
Vuetifyのインストール
BashやVsCodeのターミナルなどで、先ほど作成したプロジェクト(ここでは"my-app")に移動し、Vuetifyを導入してください。途中の質問は全てYes(or Enter)でいいです。
# my-appフォルダへ移動
cd my-app

# Vuetifyの導入
vue add vuetify
Vue Serverの起動
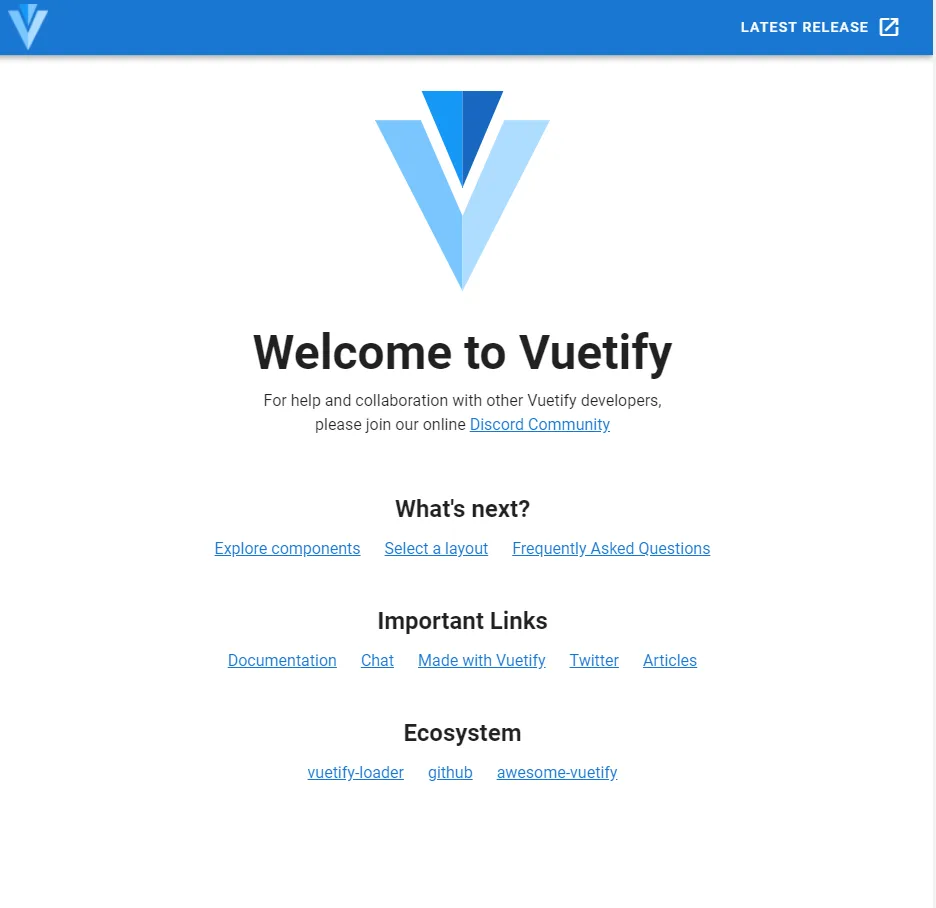
以下のコマンドを実行してhttp://localhost:8080/へアクセスしてください。
npm run serve
サーバーが起動しない場合
クローンしてきたプロジェクトだと以下のようなエラーが出る場合があります。
npm ERR! code ELIFECYCLE
npm ERR! errno 126
npm ERR! mywebapp@0.1.0 serve: vue-cli-service serve
npm ERR! Exit status 126
npm ERR!
npm ERR! Failed at the mywebapp@0.1.0 serve script.
npm ERR! This is probably not a problem with npm. There is likely additional logging output above.

npm ERR! A complete log of this run can be found in:
npm ERR! /var/root/.npm/_logs/2018-09-25T07_17_36_807Z-debug.log(引用元:https://github.com/vuejs/vue-cli/issues/2596)
これはモジュールがインストールされていないことによるエラーであることがほとんどなので、以下のコマンドを実行してモジュールをインストールしてください。
npm install以下の画面が表示されたらVueの導入は完了です。
Appファイルの編集
src/App.vueファイルのコードを全て削除し、以下のコードをコピペしてください。
Vuetifyのコンポーネントは<v-app></v-app>タグ内で呼ぶ必要があります。
<template>
  <!-- App.vue -->

  <v-app>
    <v-navigation-drawer app>
      <!-- -->
    </v-navigation-drawer>

    <v-app-bar app>
      <!-- -->
    </v-app-bar>

    <!-- Sizes your content based upon application components -->
    <v-main>
      <!-- Provides the application the proper gutter -->
      <v-container fluid>
        <!-- If using vue-router -->
        <router-view></router-view>
      </v-container>
    </v-main>

    <v-footer app>
      <!-- -->
    </v-footer>
  </v-app>
</template>

<script>
export default {
  name: "App",
  components: {},
  data: () => ({}),
  methods: {},
};
</script>

<style scoped></style>
(引用:https://vuetifyjs.com/en/components/application/)
また、 src/views/Home.vueの中身を削除し、以下をコピペしてください。
<template>
  <div class="home">
    <h1>This is Home view</h1>
  </div>
</template>
以下の画面になれば準備完了です。
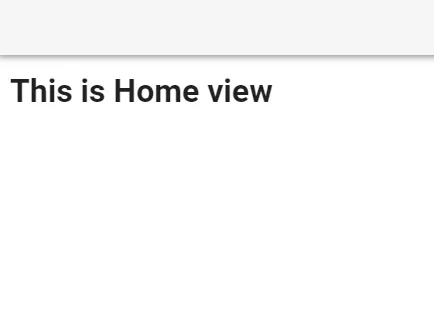
Routerについてはまた後で説明しますが、この画面はApp.vueの<router-view></router-view>タグによって、/home のURLパスに割り当てられたHome.vueの画面が表示されています。
以降、Home.vueを編集していきます。
Vuetify チートシート
パスの指定方法
vueファイル内でコンポーネント等をimportする際、パスを指定する必要があります。その際、'../../view/Example'のように相対パスで指定してもいいのですが、'@'を使うとsrcフォルダを絶対パスで指定できます。以下例です。
"@/" ← src/
"@/assets/logo.png"
"@/views/Home"
Vuetifyのカラー設定
@/plugins/vuetify.js のexport defaultメソッド内に以下の内容を追加してください。
import Vue from "vue";
import Vuetify from "vuetify/lib";
import colors from "vuetify/lib/util/colors";

Vue.use(Vuetify);

export default new Vuetify({
  theme: {
    themes: {
      light: {
        primary: colors.red.darken1, // #E53935
        secondary: colors.red.lighten4, // #FFCDD2
        accent: colors.indigo.base, // #3F51B5
        myColor: colors.green.accent4,
        myColor2: colors.blue.lighten1,
      },
    },
  },
});(引用:https://vuetifyjs.com/ja/styles/colors/)
@/views/VuetifyColor.vueに以下をコピペしてください。
<template>
  <div class="vuetifyColor">
    <h1>This is VuetifyColor view</h1>
    <v-container class="d-flex flex-column">
      <v-btn class="accent">accent</v-btn>
      <v-btn class="myColor">myColor</v-btn>
      <v-btn
        :style="{
          'background-color': this.$vuetify.theme.themes.light.myColor2,
        }"
        >変数として使う場合</v-btn
      >
      <v-btn :color="myColor">算出プロパティを使う場合</v-btn>
    </v-container>
  </div>
</template>
<script>
export default {
  computed: {
    myColor: function () {
      return this.$vuetify.theme.themes.light.myColor2;
    },
  },
};
</script>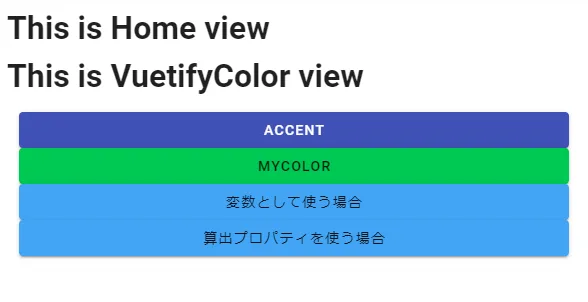
classのバインディング方法
@/views/ClassBind.vueを作成し、以下をコピペしてください。
<template>
  <div class="classBind">
    <h1>This is AddClass view</h1>
    <v-container class="d-flex flex-column">
      <v-btn>クラス無し</v-btn>
      <v-btn class="info">基本形</v-btn>
      <v-btn :class="onBlue">クラスオブジェクト使用</v-btn>
      <v-btn :class="{ info: !classOn }">クラスOFF</v-btn>
      <v-btn :class="{ info: classOn }">クラスON</v-btn>
      <v-btn :class="classMethod">メソッド</v-btn>
      <v-btn :class="['warning--text', { success: classOn }]">複合形</v-btn>
    </v-container>
  </div>
</template>

<script>
export default {
  name: "ClassBind",
  data: () => ({
    classOn: true,
    onBlue: {
      info: true,
    },
  }),
  computed: {
    classMethod: function() {
      return {
        info: true,
      };
    },
  },
};
</script>
また、@/views/Home.vueを以下に書き換えて、AddClass.vueをimportしてください。
<template>
  <div class="home">
    <h1>This is Home view</h1>
    <ClassBind></ClassBind>
  </div>
</template>

<script>
import ClassBind from "@/views/ClassBind";

export default {
  components: {
    ClassBind,
  },
};
</script>
以下の画面が表示されます。
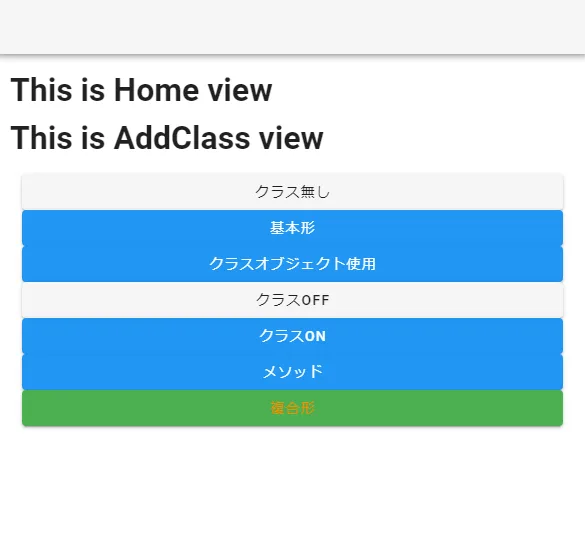
以下、説明に使用するコンポーネントのコードのみを掲載しますが、同様にHome.vue等にコンポーネントを importして使ってください。
styleのバインディング方法
@/views/StyleBind.vueを作成し、以下をコピペしてください。
<template>
  <div class="styleBind">
    <h1>This is StyleBind view</h1>
    <v-container class="d-flex flex-column">
      <v-btn>スタイル無し</v-btn>
      <v-btn style="color: red">基本形</v-btn>
      <v-btn :style="onRed">スタイルオブジェクト使用</v-btn>
      <v-btn :style="styleMethod">メソッド</v-btn>
      <v-btn :style="{ color: 'red', fontSize: '2rem' }">複数形</v-btn>
      <v-btn :style="[onRed, largeFont]">配列形</v-btn>
      <v-btn :style="[onRed, { fontSize: '2rem' }]">複合形</v-btn>
    </v-container>
  </div>
</template>

<script>
export default {
  name: "StyleBind",
  data: () => ({
    styleOn: true,
    onRed: {
      color: "red",
    },
    largeFont: {
      fontSize: "2rem",
    },
  }),
  computed: {
    styleMethod: function() {
      return {
        color: "red",
      };
    },
  },
};
</script>
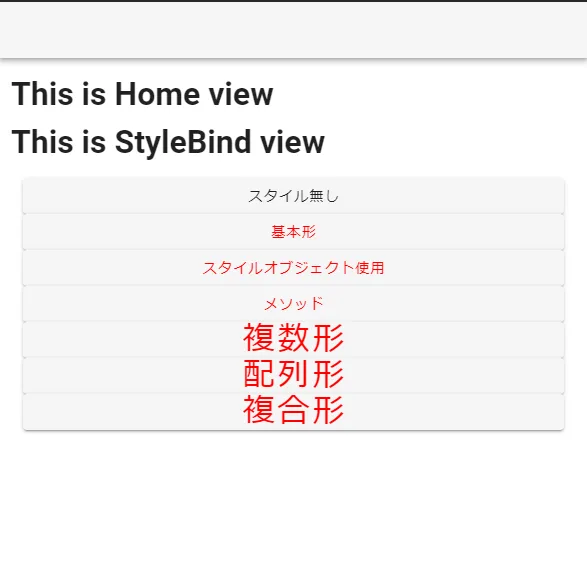
子コンポーネントのCheckboxの使い方
@/views/ParentCheckbox.vueを作成し、以下をコピペしてください。
<template>
  <div class="parentCheckbox">
    <ChildCheckbox
      :parentSelected="selected"
      :parentData="data"
      @update-data="update"
    ></ChildCheckbox>
    {{ selected }}
  </div>
</template>

<script>
import ChildCheckbox from "@/components/ChildCheckbox";
export default {
  name: "ParentCheckbox",
  data: () => ({
    selected: [],
    data: [
      { id: 0, name: "dog" },
      { id: 1, name: "cat" },
      { id: 2, name: "cow" },
    ],
  }),
  components: {
    ChildCheckbox,
  },
  methods: {
    update: function (newVal) {
      this.selected = newVal;
    },
  },
};
</script>
@/components/ChildCheckbox.vueを作成し、以下をコピペしてください。
<template>
  <div class="childCheckbox">
    <v-container>
      <template v-for="(item, index) in parentData">
        <v-checkbox
          v-model="selected"
          :label="item.name"
          :value="item.id"
          :key="`childCheckbox-${index}`"
        ></v-checkbox>
      </template>
    </v-container>
  </div>
</template>

<script>
export default {
  name: "ChildCheckbox",
  props: {
    parentSelected: {
      type: Array,
      default: function () {
        return [];
      },
    },
    parentData: {
      type: Array,
      default: function () {
        return [];
      },
    },
  },
  computed: {
    selected: {
      get() {
        return this.parentSelected;
      },
      set(newVal) {
        this.$emit("update-data", newVal);
      },
    },
  },
};
</script>
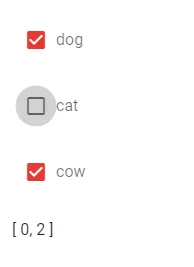
vueのドキュメントを見ると、v-modelを使った実装をよく見かけますが、子コンポーネントの場合はその実装を行うことができません。なぜならpropsで送ったデータに対して直接変更を行うとエラーになるからです。
子コンポーネントに変数を送った場合、基本的にはcomputedを一枚かませて利用してください。
VeeValidateを使ったバリデーション
以下のコマンドを`my-app`フォルダ内で実行してください。
npm install vee-validate --save@/main.jsに以下をコピペして追加してください。
import Vue from "vue";
import App from "./App.vue";
import router from "./router";
import vuetify from "./plugins/vuetify";
import {
  extend,
  ValidationObserver,
  ValidationProvider,
  setInteractionMode,
} from "vee-validate";
import * as rules from "vee-validate/dist/rules";
import { messages } from "vee-validate/dist/locale/en.json";

Vue.config.productionTip = false;

Object.keys(rules).forEach((rule) => {
  extend(rule, {
    ...rules[rule],
    message: messages[rule],
  });
});

Vue.component("ValidationProvider", ValidationProvider);
Vue.component("ValidationObserver", ValidationObserver);
setInteractionMode("aggressive");

new Vue({
  router,
  vuetify,
  render: (h) => h(App),
}).$mount("#app");
@/views/Validation.vueを作成し、以下をコピペしてください。
<template>
  <div class="validation">
    <ValidationObserver ref="observer" v-slot="{ invalid }">
      <v-form>
        <ValidationProvider
          name="Name"
          rules="required|alpha|max:10"
          v-slot="{ errors }"
        >
          <v-text-field
            v-model="name"
            :counter="10"
            :error-messages="errors"
            label="Name"
            required
          ></v-text-field>
        </ValidationProvider>
        <ValidationProvider
          name="Number"
          rules="required|numeric|max:4"
          v-slot="{ errors }"
        >
          <v-text-field
            v-model="num"
            :counter="4"
            :error-messages="errors"
            label="Number"
            required
          ></v-text-field>
        </ValidationProvider>
        <ValidationProvider name="Radio" rules="required" v-slot="{ errors }">
          <v-radio-group
            v-model="radioGroup"
            :mandatory="false"
            :error-messages="errors"
          >
            <v-radio label="No" :value="false"></v-radio>
            <v-radio label="Yes" :value="true"></v-radio>
          </v-radio-group>
        </ValidationProvider>
        <v-btn class="mr-4" @click="submit" :disabled="invalid">
          submit
        </v-btn>
        <v-btn class="mr-4" @click="check">
          check
        </v-btn>
        <v-btn @click="clear">
          clear
        </v-btn>
      </v-form>
    </ValidationObserver>
  </div>
</template>

<script>
export default {
  name: "Validation",
  data: () => ({
    name: "",
    num: "",
    radioGroup: null,
    errors: null,
  }),

  methods: {
    submit() {
      this.$refs.observer.validate();
      alert(
        `name: ${this.name}\nnum: ${this.num}\nradioGroup: ${this.radioGroup}`
      );
    },
    check() {
      const error = [];
      if (!this.isAlphaOnly(this.name)) error.push(this.name);
      if (!this.isNumber(this.num)) error.push(this.num);
      if (!this.isBool(this.radioGroup)) error.push(this.radioGroup);

      const errorMessage = error.map((value) => {
        return `${value} is invalid.\n`;
      });
      if (error.length > 0) alert(errorMessage);
    },
    clear() {
      this.name = "";
      this.num = "";
      this.radioGroup = null;
      this.$refs.observer.reset();
    },
    isAlphaOnly(value) {
      try {
        return !value.match(/[^a-z]/gi);
      } catch (error) {
        return false;
      }
    },
    isNumber(value) {
      try {
        return typeof value === "number";
      } catch (error) {
        return false;
      }
    },
    isBool(value) {
      try {
        return typeof value === "boolean";
      } catch (error) {
        return false;
      }
    },
  },
};
</script>
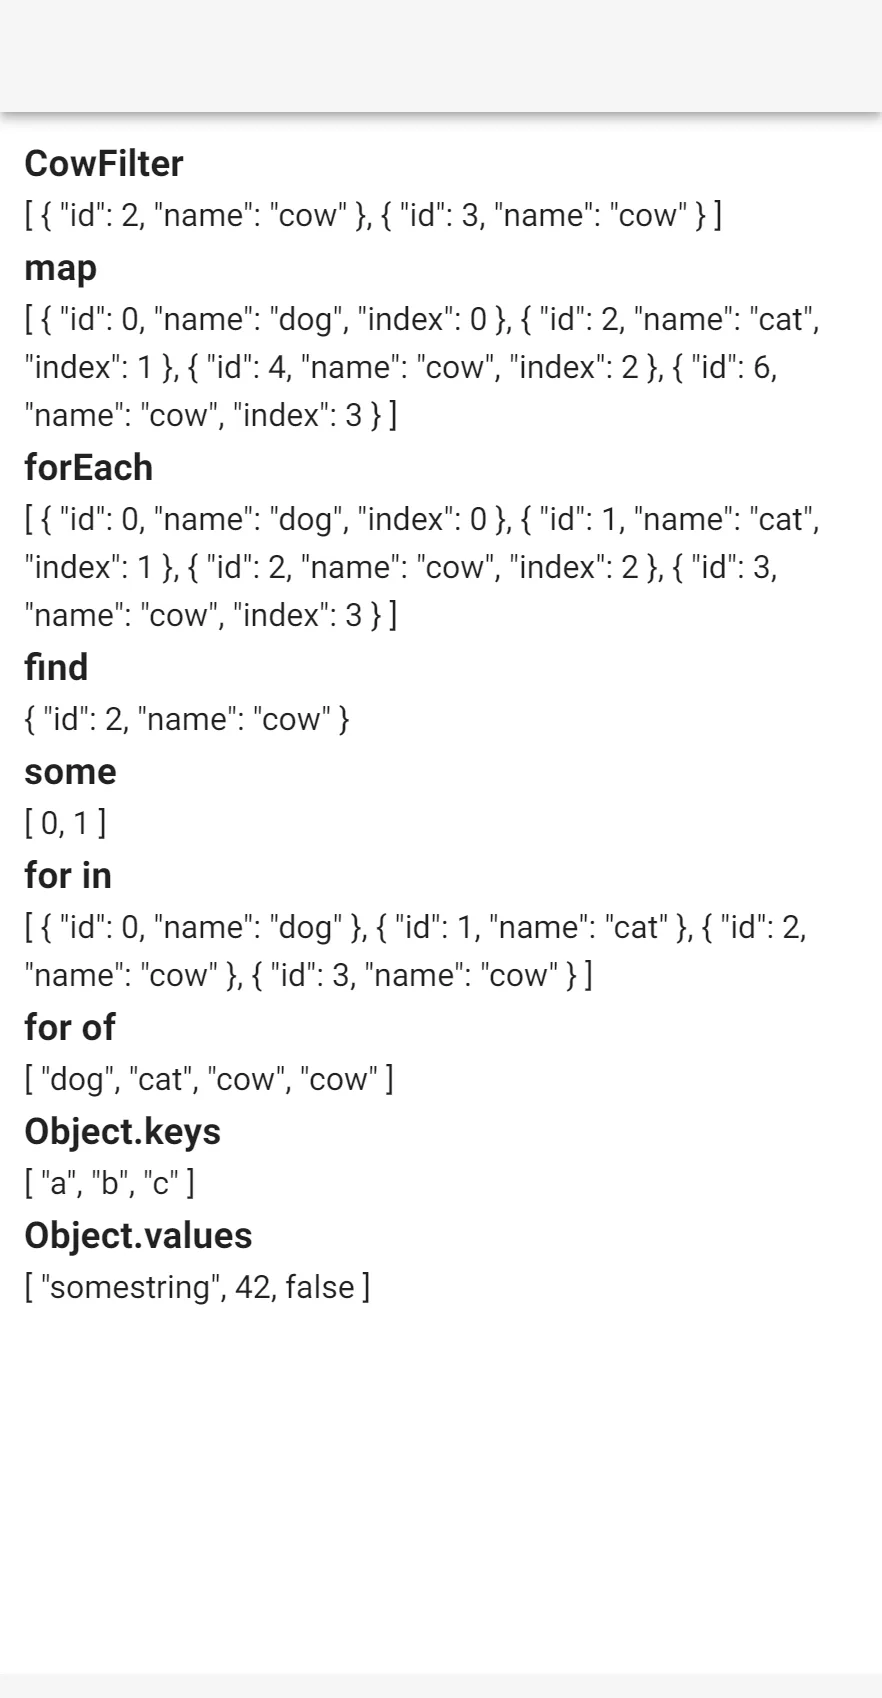
Javascriptの頻出繰り返し構文
@/views/JavascriptMethod.vueを作成し、以下をコピペしてください。
<template>
  <div id="JavascriptMethod">
    <h3>CowFilter</h3>
    {{ filterMethod }}

    <h3>map</h3>
    {{ mapMethod }}

    <h3>forEach</h3>
    {{ forEachMethod }}

    <h3>find</h3>
    {{ findMethod }}

    <h3>some</h3>
    {{ someMethod }}

    <h3>for in</h3>
    {{ forInMethod }}

    <h3>for of</h3>
    {{ forOfMethod }}

    <h3>Object.keys</h3>
    {{ objectKeysMethod }}

    <h3>Object.values</h3>
    {{ objectValuesMethod }}
  </div>
</template>
<script>
export default {
  name: "JavascriptMethod",
  data: () => ({
    data: [
      { id: 0, name: "dog" },
      { id: 1, name: "cat" },
      { id: 2, name: "cow" },
      { id: 3, name: "cow" },
    ],
    objectData: {
      a: "somestring",
      b: 42,
      c: false,
    },
  }),
  computed: {
    filterMethod: function () {
      return this.data.filter((item) => {
        return item.name === "cow";
      });
    },
    mapMethod: function () {
      return this.data.map((item, index) => {
        return { id: item.id * 2, name: item.name, index: index };
      });
    },
    forEachMethod: function () {
      const result = [];
      this.data.map((item, index) => {
        result.push({ id: item.id, name: item.name, index: index });
      });
      return result;
    },
    findMethod: function () {
      return this.data.find((item) => {
        return item.name === "cow";
      });
    },
    someMethod: function () {
      const result = [];
      this.data.some((item, index) => {
        if (item.name === "cow") {
          return true;
        }
        result.push(index);
      });
      return result;
    },
    forInMethod: function () {
      const result = [];
      for (const key in this.data) {
        result.push(this.data[key]);
      }
      return result;
    },
    forOfMethod: function () {
      const result = [];
      for (const item of this.data) {
        result.push(item.name);
      }
      return result;
    },
    objectKeysMethod: function () {
      return Object.keys(this.objectData);
    },
    objectValuesMethod: function () {
      return Object.values(this.objectData);
    },
  },
};
</script>